This post has already been read 3318 times!
Introduction
A WiFi booster is a device which typically can be used on a campsite to pick up from your pitch the wifi signal which might otherwise only be available at the reception. Range is not infinite of course but depending on signal strength you should be able to log in. Another use is on sites where each device needs a separate account and payment, for example the Caravan Club. A WiFi booster should normally allow you to share such a connection amongst several devices.
You can buy ready-made WiFi boosters, the main suppliers seem to by Motorhome WiFi and Solwise. The system from Motorhome WiFi uses commercially available components and it is possible to buy these yourself and configure them to set up your own WiFi booster.
Warning!
The description below describes how I built a WiFi booster, mine works but this project delves into the depths of networking about which I am not an expert! It took me a couple of days to get the system working and much Googling was done searching for answers. If after buying all the bits, which are not cheap, you can’t get it to work I cannot guarantee I will be able to help you, it is best to assume you are on your own sorting out any problems. If you have any doubts about your knowledge of computing and networks please don’t try this, you could end up with expensive paper weights! If you want a WiFi booster then please buy one from a supplier who can offer technical help and will sell you a system already configured.
If you still want to proceed, here are the instructions, which start with a repeat of the warning above.
Setting up Your Own WiFi Booster
It is possible to make your own WiFi booster rather than buying one of the ready-made solutions. This will be a bit cheaper (but not massively so) and the setting up is not for anyone who struggles with computers, the configuration of the units requires the dark arts of networking and if after all your efforts it doesn’t work there is no supplier you can ring and ask for advice. You are on your own! So my advice is don’t do what the next few pages describe unless you are prepared to do a bit of head scratching if it all doesn’t work out of the box. You have been warned!
If anyone does want to proceed after that warning the components required are:
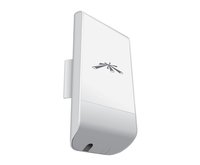
Ubiquiti Nanostation Loco M2
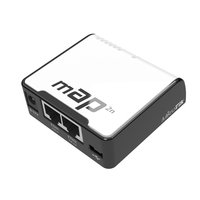
Mikrotik RouterBOARD mAP
I bought the first two items from www.senetic.co.uk You also need at least two Ethernet cables of suitable length – depending on installation and in my case an Ethernet connector for tidying up the installation. The connector was from RS and the stock number was 7684422. This isn’t essential and there are cheaper alternatives but it is a neat solution compared to using a typical domestic sized Ethernet socket. If you use a connector you will need another short Ethernet cable.
The total cost of the NanoStation and mAP including postage was £105. Other suppliers are available, eBay for example is probably cheaper and other components could be used. In particular the NanoStation M2 (without the Loco bit) has a higher gain than the Loco version and could be used instead though it is larger and more expensive. There is also an M5 version which works at 5GHz but few WiFi networks on campsites use this frequency.
Setting up is in two stages, configuring the NanoStation and configuring the mAP. Remember some changes cause the devices to reboot which you need to leave time to happen before despairing that nothing is working!
Ubiquiti NanoStation Setup
To configure the NanoStation you need a Mac, PC or laptop with an Ethernet port. It can probably be done with a Linux computer as well but you are on your own if you want to try that! In the resources section at the end there is a link to a good description of how to set up the device using a Mac although most of what is said applies to other types of computer as well.
First, turn off or disable the WiFi on your laptop or PC.
Connect an Ethernet cable to the socket in the bottom of the NanoStation M2. This is under a cover which you remove by pressing the button on the back of the unit. Connect the other end of the Ethernet cable into the PoE out socket on the PoE adaptor which came with the NanoStation.
Connect another Ethernet cable into the LAN port of the PoE adaptor and the other end of the cable into the LAN port of your PC (or whatever you are using). Then switch on the PoE adaptor at the mains and the NanoStation will boot up.
You now need to configure your computer for a static IP address, see resources section below for one link for Windows devices.
Enter the IP Address of 192.168.1.10 and sub-net mask of 255.255.255.0
Open up your web browser, this is likely to create an error message because your computer is no longer connected to the internet, ignore this and enter the IP address 192.168.1.20 into the address bar, this is the default IP address of the NanoStation. You may get another warning at this stage that the web page is insecure, if this happens in the Chrome browser click on the Advanced button then at the bottom click on the Proceed to 192.168.1.20 link. In other systems do whatever is necessary to get past any warnings. Log into the page which will appear with the default username of ubnt and password of ubnt, select your country* and log in after ticking the accept terms and conditions box.
*I have read if you select the USA instead of the UK the unit will be more powerful, as the USA do not have the same power restrictions as the EU. I haven’t tried this but any WiFi connection is a two way affair and having a more powerful transmitter won’t help if the signal you want to connect to is weak. You may also fry your brains so try this option at your own risk!
Open the network tab. Select “Router” in the network mode field. Then check (tick) and enable the NAT field lower down on the page. I changed the DHCP Fallback IP address to 192.168.2.1 though I am not sure this is essential but it didn’t seem to do any harm. Next, under DHCP Server near the bottom of the page click on Enabled which will open up some more boxes below it. Into these enter the IP address as 192.168.2.1 and Range Start as 192.168.2.3 and Range End as 192.168.2.254. The page should now look like this: (which will be too small to read but there is a link in the Resources section to a version with full sized images)
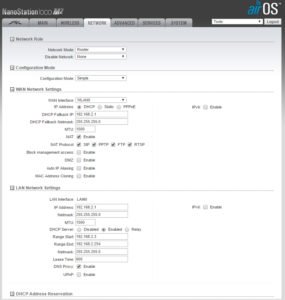
Now click Change at the bottom of the page then Apply at the top. Dismiss any warnings to change your admin password. This can be done next.
Click on the System tab. On this page you can change the password. I suggest keep the username as ubnt but next to this, where there is a key symbol, click on this and after entering the default password (ubnt) enter your own unique password. Click on the Change button then on the Apply button, which will cause the NanoStation to reboot.
Go back into your computer and change the network card from the static IP address to DHCP. On applying this the computer should connect to the NanoStation. If it doesn’t double check you have done everything as described above. The unit has a reset button under the cover if you need to start again – as I had to at one stage!
Go back to your web browser and enter the address 192.168.2.1 which is an important address to remember because it is the address you will need every time you want to connect to a new WiFi network. Log in to the page which opens with ubnt and your new password.
Click on the Wireless tab and then click on Select on the Wireless page. The available WiFi networks will then be listed. If you double click on the Signal column it will sort them into strongest signal first. The signal strength figure should be as small as possible, -50 is better than -80. Select the network (SSID) you want and then at the bottom of the page click on the Lock to AP button. Click on Change then Apply. The NanoStation will reboot again and the lights on the unit should show the signal strength of the network. You are now connected to the internet.
What you now have is a very good connection to your home network and if like me you have an office in a shed in the garden with an iffy WiFi connection back to the house then the NanoStation may well solve your connection problems for you! The only niggle I have had with it is you need to turn the NanoStation on first before starting the PC. If you forget and start the PC then the Nanotation, started later, seems to have a problem finding the right IP address. On a Windows PC you can sort this by opening up a command prompt and entering “ipconfig /renew” without the “” of course. Or restart everything in the correct order. Why this should be so I don’t know. (Afternote: For some reason after several weeks of use the device has stopped doing this now and if I forget to turn the M2 on first and do it after the PC has started it is now finding the correct IP address and logging in to my WiFi. I have no idea why it is now behaving properly!)
Setting up the WiFi
At this point your computer will be connected to the internet via the Ethernet cable but for use with tablets and mobile devices we need to add a WiFi network. I used the Mikrotik RouterBOARD RB mAP2n.
In the initial setup to check everything was working I powered this device with a normal 5v micro-USB phone charger and powered the NanoStation using its own PoE (Power over Ethernet) adaptor with an Ethernet cable running from the LAN connection on the PoE adaptor to the ETH2 port on the mAP. It took me quite a bit of experimentation to find the best configuration for this unit and after all that experimentation I found the best configuration was to leave it completely alone and use it how it comes out of the box!
You can access the Mikrotik configuration screen by entering 192.168.88.1 which will take you to a utility which will allow a great deal of customisation of the unit but as already mentioned, I found this wasn’t necessary. The unit will connect and communicate with the Nanostation without any modification.
Both devices will accept a wide range of input voltages and can work perfectly well from a 12v supply. To install the system in my Murvi I cut off the plug and lead from the 24v power supply which came with the mAP. There are two wires in the lead, one with a solid grey line on it and one with a dashed line. I found the dashed line was the positive wire but you should check yours to see if it is any different. I don’t know what would happen if you connected the unit with reversed polarity but the consequences might be expensive!
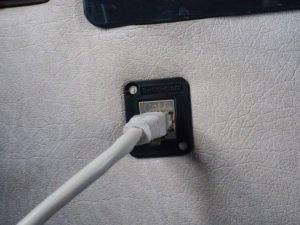
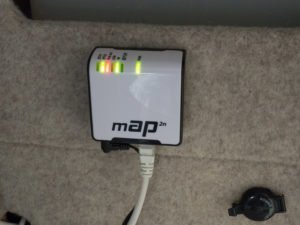
For installation I took the positive feed from a spare terminal on the fuse box and added a 3A fuse. To make the installation a little neater I fitted an Ethernet socket (or to be more exact, an Ethernet connector as it has a socket on both the front and rear) on the panel below the Webasto controller. The mAP I have simply stuck to the back of the wardrobe using Velcro. I have not fitted a switch in the power supply and to turn it on or off I just unplug the power lead. I may fit a switch later if I can summon the energy!
Here is the system in use, in this case just as a test as the NanoStation is stuck to an inside window, it would normally be outside but like this it can see through the windscreen and pick up the WiFi in the house.
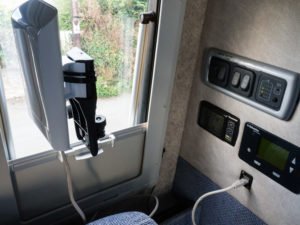
Here is a close up of the Ethernet connector. Another lead goes from the back of this connector and out into the wardrobe through the same hole the signal for the TV emerges. The connector can be screwed in place but I didn’t have any screws small enough but it is staying in place well enough for the moment.
And here is the mAP in place inside the wardrobe. I did consider putting it behind the panel with all the other electrics but it is useful to be able to see what the LED lights are doing.
Using the System
From your tablet or smart phone open up the WiFi settings and log into the Mikrotik WiFi signal you should be able to see – assuming you haven’t changed the name of this SSID which you can if you want in the NanoStation settings. Enter the WiFi password you chose during setup.
Open up your web browser and enter 192.168.2.1 in the address bar. You may well get warnings about the address not being safe, ignore these and do whatever is necessary to get past them – in Android for example you need to click on the Advanced button which will show up.
Log in with the user name ubnt and whatever your password is. On the page which opens select the Wireless tab and click on the Select button which you will be able to see. A pop up window will open and the NanoStation will start scanning for available networks. The signal strength is given as a negative number and a lower figure is better, so choose -62 instead of -80 if you have a choice of available networks. The NanoStation is directional so it needs to be pointing at the origin of the WiFi signal. Select the network you want and click on the Lock to AP button in the bottom right of this pop up. Enter any WiFi key required in the correct field on the wireless tab for this network and then click the Change button in the bottom right of this screen then the Apply button near the top of the page. The NanoStation will now reboot so you need to give it time to do this. The strength of the signal it is receiving is shown on the back of the device by LEDs. If you click on the Main tab you should see the device has logged in to the chosen network. To refine the connection you can click on Tools in the top right of the page and select Align antenna and then twiddle with the NanoStation until you get the best signal.
You should now be connected to the WiFi network which may require you to login separately with any details provided for example by the campsite reception.
Most networks should allow more than one device to log in to the local network but there have been a very small number of cases reported where this has been blocked. There are also a very small number of sites using 5 GHz networks which this NanoStation won’t connect to.
Resources:
A PDF version of this description with larger images of the web pages: Nano Station Setup
A good video talk-through on how to set up the NanoStation (in American!)
Setting a static IP address (Windows) – the video above covers a Mac.
http://www.howtogeek.com/howto/19249/how-to-assign-a-static-ip-address-in-xp-vista-or-windows-7/
This is an article on the Ubiquiti website which describes configuring a NanoStation for WiFi. It is simliar to the description given above but uses different IP addresses.
https://help.ubnt.com/hc/en-us/articles/205197710-airMAX-Configure-a-Long-range-WiFi-Client