This post has already been read 2526 times!
A family member recently returned from a motorhome holiday in Spain and promptly went down with a bad case of Giardiasis. This isn’t something I had heard about before but it is a parasite which latches onto the inside of the gut and feeds on the lining of the intestines. Even several weeks later he was still not completely recovered, in some cases symptoms can last for a very long time. The protozoa Giardia can be transmitted in many ways, including contact with an infected individual, food, swimming in contaminated water and from drinking contaminated water. On our recent trip to Corsica we took on board contaminated water three times in four weeks. Twice we found bits floating in the water and once it looked clear but tasted foul.
We have so far been lucky but it can only be a matter of time before we eventually succumb to something. So I decided to fit a water filter to our Murvi Morocco. Bottled water is generally safe but it takes up room if you want to carry several days supplies. Our practice up to now has been to fill a 5 litre plastic container with water and use this for drinking. One advantage of the container is you can see if the water is discoloured but the bugs which might strike us down are invisible to the naked eye.
This is where a suitable water filter comes into play. The Nature Pure water filter is well established but they had a bit of a scandal recently with allegations they were selling a filter which was supposed to be anti-microbial but wasn’t. It is also expensive so I looked for something a bit cheaper and settled on the 3M water filter kit, details of which can be seen here: https://www.finerfilters.co.uk/3m-under-sink-drinking-water-filter-kit-with-ap2-c405-sg-bacteria-rated-filter-full-diy-system.html
A cheaper kit available from the same company but the filter only works down to 20 microns which is probably good enough for removing the larger tadpoles but to strain out bugs the half micron filter I chose is better. None of these filters claim to remove 100% of anything harmful but 99.9999% or whatever it is should be good enough.
The kit comes with a tap, filter, plastic tubing and a device for connecting it to a domestic water supply which can be discarded. To complete the installation in the Murvi I also had to buy a few additional parts. These are listed with suppliers later.
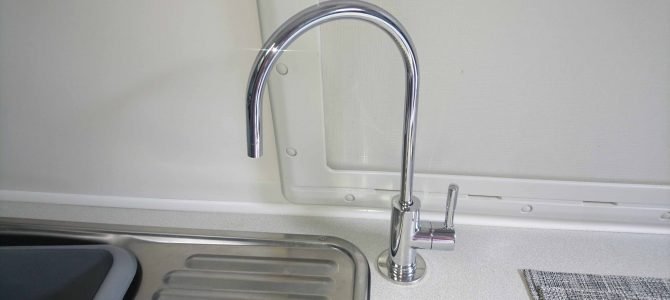
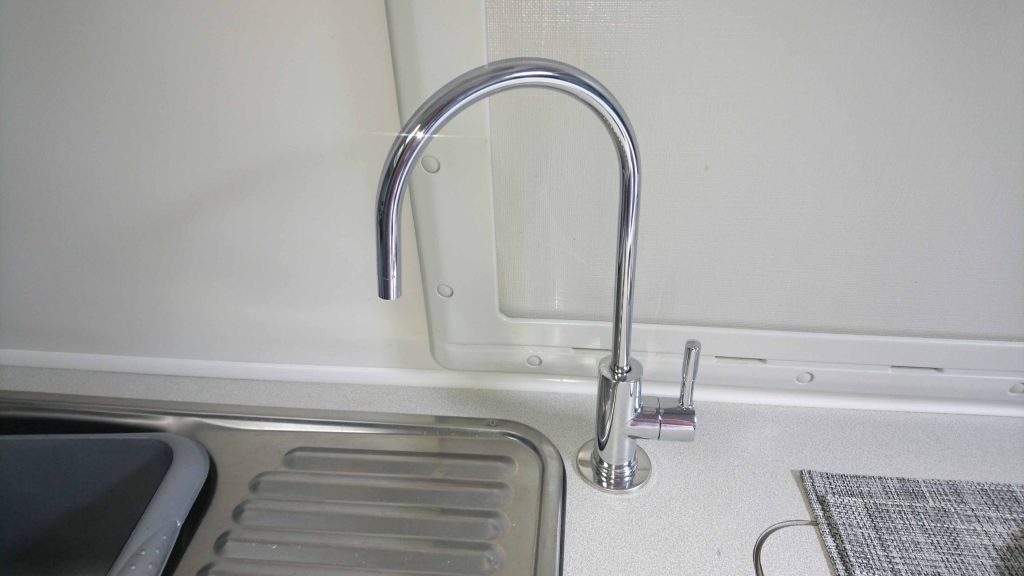
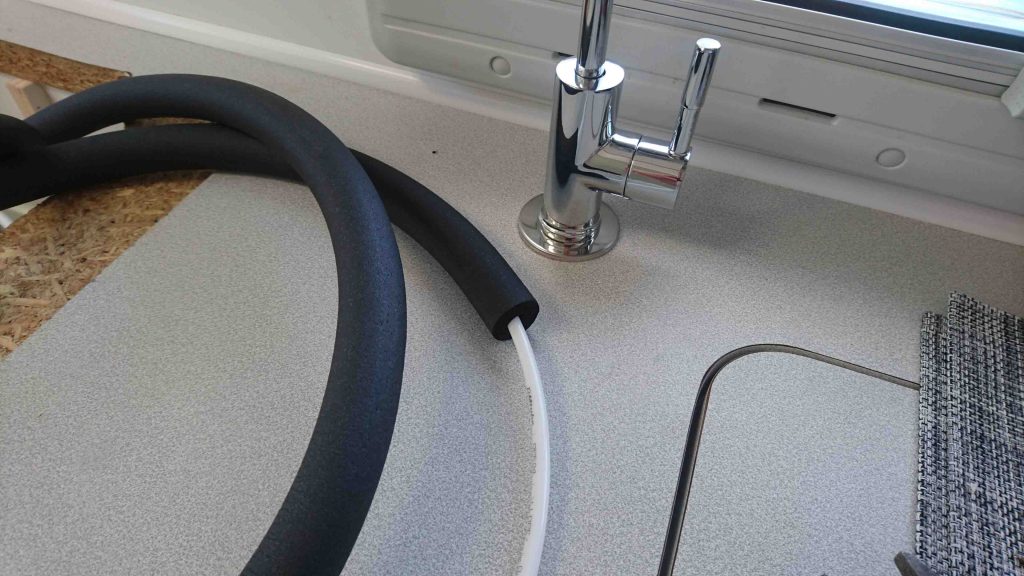
Ideally, the tap needs to be over the sink but there was no obvious place on the left of our sink to fit it without losing useful storage space. Instead, I decided to fit it over the draining board, as shown in this photograph after the job was completed.
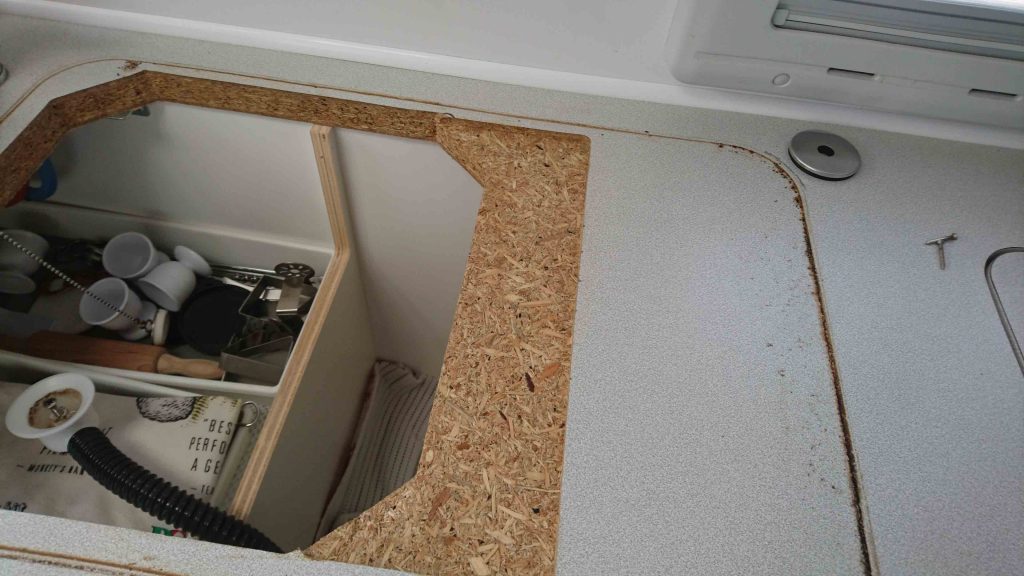
Before drilling the hole for the tap I removed the sink. It is held in by 4 screws and undoing the screw in the plughole allows the drain to be disconnected. There is a rubber seal around the edge of the sink which I removed to clean but it is tricky to refit because when you turn the sink over to fit it the seal falls off! If you can leave the seal in place it will be easier.
One reason for removing the sink is it makes it easier to ensure the hole is drilled in the right place with sufficient room underneath for the securing nut and rubber washer. I drilled a 3mm pilot hole first, which gives a second opportunity to check the hole is in the right place before opening up the hole to 13mm.
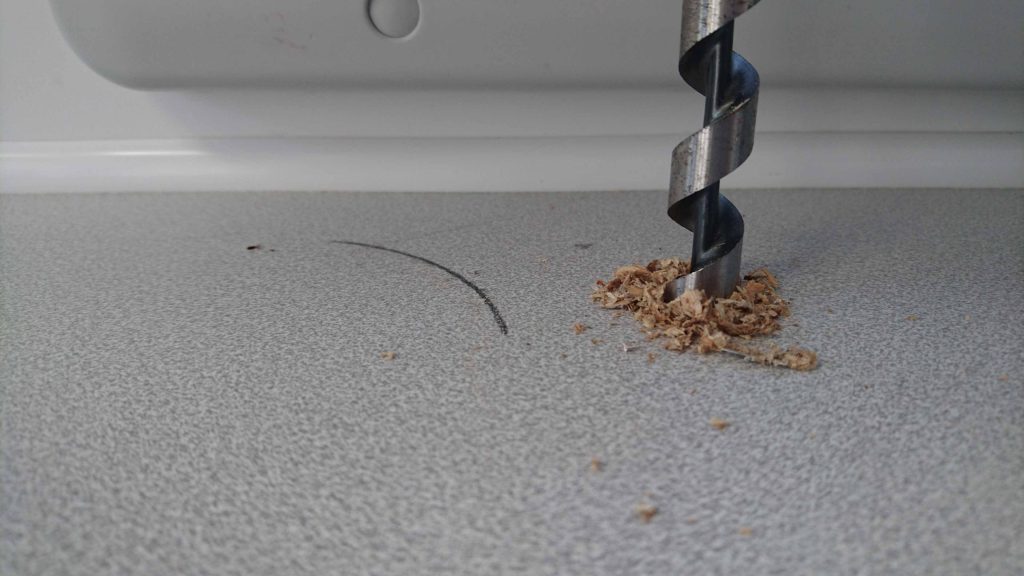
The arc drawn in pencil in the photograph above is the location of the edge of the sink. There isn’t a lot of room to work but access is made easier if you remove the cupboard door. This means taking out a lot of screws but it makes the job much easier.
In the photograph below you can see the tap and the 1/4″ plastic pipe the kit comes with. I also bought some insulation in both 12mm and 1/4″ sizes. To install the pipe I slid the insulation over the pipe then pushed it through the hole which sits behind the water tank and is where the hot and cold water pipes come through to the sink. I might just have been lucky, as this hole is very hard to see, but the pipe slid in easily and I could then grab it from inside the cupboard in the corner to the left of the sink and pull it through to the new tap. If you have problems you could try pushing it through from the sink side.
Here is a view from underneath.
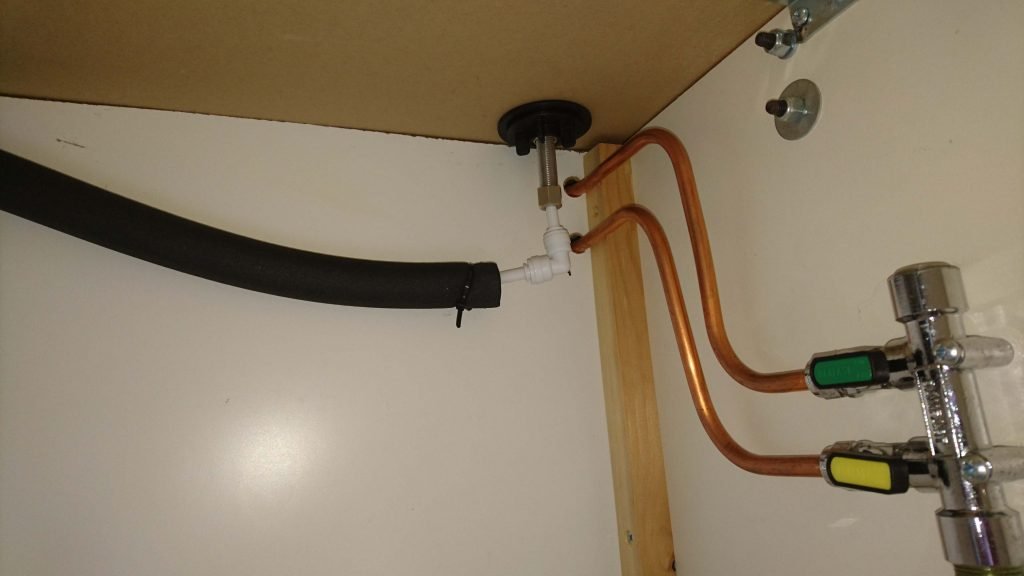
To make things more compact I have fitted a 1/4″ push fit right angle bend. The photograph above also shows that the position of the tap is well out of the way and there is no real loss of storage space. The zip tie you can see at the end of the insulation is attached to a self-adhesive pad. I also subsequently added some of the 12mm insulation over the elbow and bottom of the tap.
Where the pipe runs behind the sink I had to remove a little bit of wood to make room for it.
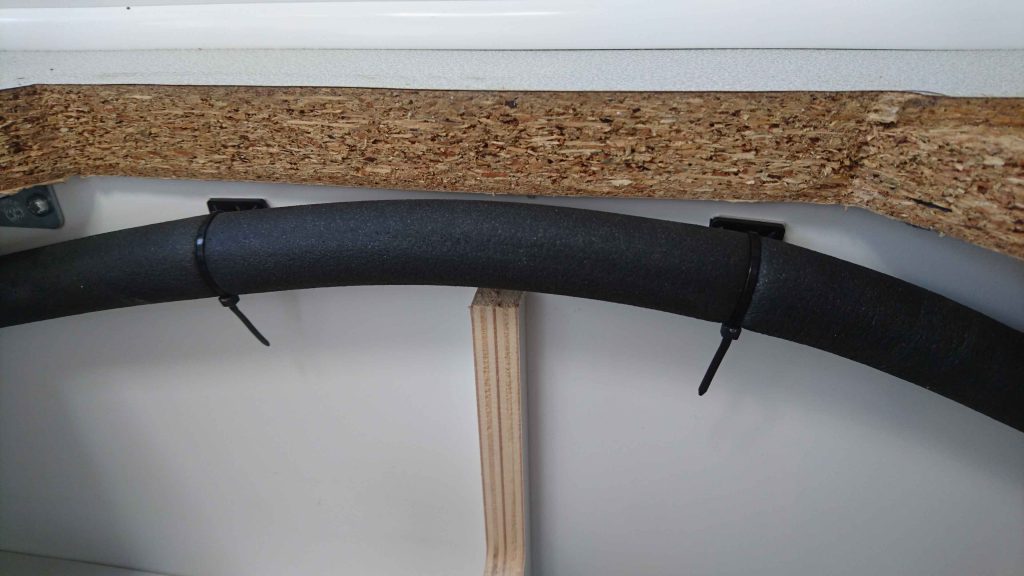
In the second photograph above you can see this panel reached up to the underside of the work top but by removing about 20mm from the end space for the pipe is created. I’ve also used two more pads and zip ties but they are probably not essential as once in position the sink holds the pipe in position.
Work inside the vehicle is now complete. The filter could have been fitted under the worktop somewhere but it would take up space so I decided to fit it at the rear of the vehicle.
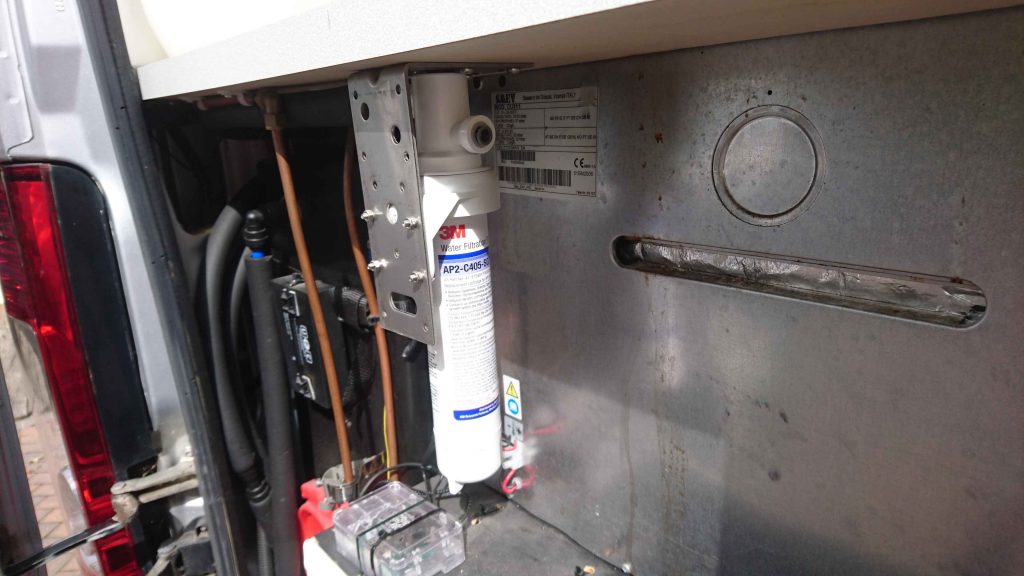
Our Murvi has an oven and vehicles without an oven may not have room where I decided to fit the filter but you should find room further to the left in front of the water tank. I would not advise fitting the filter in front of the fridge, if you have the large one, as it will be cooked by the hot air coming from it.
I fitted the filter to a 150 * 90 * 60 stainless steel bracket from Tool Station. The bracket is secured under the worktop with 3/4″ stainless steel screws and the filter housing is secured in turn to the bracket using the pre-drilled holes in the bracket and 4mm stainless steel bolts. This requires new holes drilled in the filter holder but this is easy to do.
It might look odd with the filter hiding behind the bracket but this is because when viewed from the front the inlet to the filter is on the left and the outlet on the right which is the wrong way round for this installation. The inlet needs to be on the right and this is easy to do if you fit it in the way shown.
I forgot to take photographs during the next stage so here it is all fitted. The outlet going to the tap goes off to the left and is zip tied to the gas pipes for support before it bends round the side of the water tank and through the hole mentioned earlier. I should stress the gas pipes are firmly secured to the underside of the worktop and are not in danger of being moved by the water pipe.
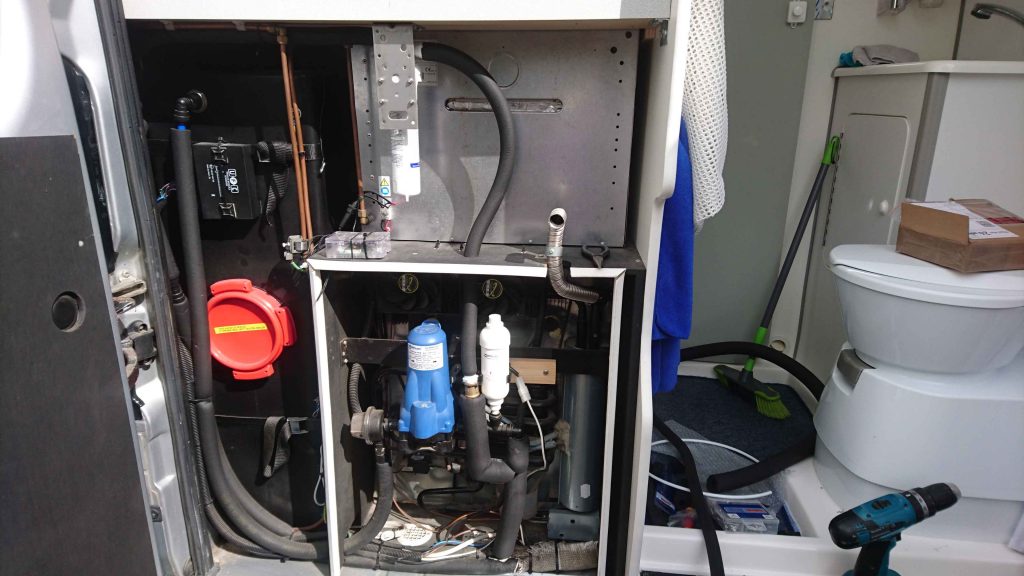
I fitted a 12mm push fit tee in the pipe which runs down from the pump then after a short section of 12mm pipe a right angle elbow takes the pipe up vertically. The white cylinder you can see to the right of the water pump is a Whale accumulator. Not all vehicles have this although they are now a standard fitting I think. It is used to smooth out the flow from the pump. The water piping in your Murvi may be different but essentially all you need to do is connect to the cold water pipe somewhere downstream of the pump and any accumulator fitted. I found the pipe fairly easy to cut with a sharp craft knife. Removing the push fit adaptors is fairly easy once you have the knack. I use two flat bladed screwdrivers to push the part nearest the pipe back into the body of the fitting. The pipe can then be withdrawn. You will find videos on YouTube which have an explanation.
The only awkward part of this installation was finding an elegant way to go from the 12mm OD pipes used in the Murvi to the 1/4″ pipe for the filter. I couldn’t find a 12mm to 1/4″ push fit adapter, they may exist but Google didn’t know about them if they do! My solution is a bit of a bodge but it works and consists of three elements. Firstly a 12mm push fit to 1/2″ BSP male adaptor, then a 1/2″ BSP female to female adaptor (a threaded tube really) and finally a 1/2″ BSP male to 1/4″ push fit adaptor. The three are connected together, using PTFE tape where appropriate, and can be seen just to the left of the Whale accumulator. A zip tie secures this contraption to the Terry clip holding the accumulator and I subsequently covered it in insulation.
The 1/4″ pipe passes through the top of the plywood supporting the oven with insulation butting up to it on both sides. At the moment the pipe going to the filter is unsupported but I will fit a vertical batten of wood later to secure it.
In addition to the filter kit I needed additional parts from several suppliers. The 12mm push fit components all came from www.caravanaccessoryshop.co.uk and the 1/4″ push fit items from Amazon UK. The insulation was from www.bes.co.uk. The bracket and 1/2″ BSP female adaptor were from Tool Station. I already had a short length of 12mm OD plastic pipe but the Caravan Accessory Shop sell it by the metre if required.
I haven’t insulated around the filter as living in South Devon it doesn’t get very cold here but this is something which could be done if you lived further north.
Afternote. The filter has performed faultlessly since it was fitted. I changed the filter after six months as the flow rate began to slow down although it was still usable. The instructions on the filter say it should be changed every 12 months but given our habit of going to odd places it isn’t surprising we had to change it sooner. A clever feature, which I hadn’t noticed before, is when the filter is removed no water escapes from the filter holder. This was useful when I descaled the boiler. I didn’t want to contaminate the filter so I just unscrewed it and replaced it later after descaling and flushing the system afterwards with clean water.
